
Wednesday, 10 June 2015
I,m dreaming for a white Christmas!
Its the height of summer here but I dream for a bit of snow even though we don't get snow like this here, only a smattering, barely enough for a snowball most of the time :-)

Thursday, 4 June 2015
Seaton Carew around the 19th century.
I have just finished another watercolour in a small series of bringing to life old early 19th century photos of around Hartlepool to life.
As ever this was taken from a photo over 100 years old so the actual quality of the image was rather naff so I had to use a tad of imagination to fill in the completely underexposed areas that you always get on photography of this age but I feel I did it justice. The area is Seaton Carew and how different it looks today !!
As ever this was taken from a photo over 100 years old so the actual quality of the image was rather naff so I had to use a tad of imagination to fill in the completely underexposed areas that you always get on photography of this age but I feel I did it justice. The area is Seaton Carew and how different it looks today !!

Tuesday, 2 June 2015
Sunset
I don't really do sunsets in watercolour as I feel it's better suited for an opaque medium such as oils or acrylics but looking through my photographs I came across one I took last November at the Headland in Hartlepool so I thought that I would give it a try.
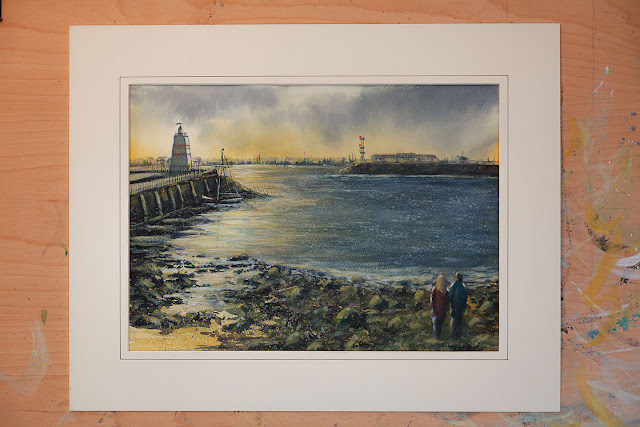
First thing was to keep the colours muted as it is very easy to make the scene look overly colourful and gaudy and secondly to try and watch the tonal values. The end result pretty much matched the atmosphere of my photo and I may try another sometime!

Tuesday, 26 May 2015
Small watercolours.
I have recently been sorting through my watercolour stuff and noticed how much scrap paper I am left with. Normally I would just use this leftover paper for swatches of colour but I thought about trying to paint much smaller pictures and see what happens especially as I have a load of mount board inserts, the part of a mount that is left from cutting a larger mount so I simply cut these inserts into another mount which the watercolour scrap paper seems to fit nicely!
I now have enough materials to paint many more watercolours and have them mounted...no waste :-)
I now have enough materials to paint many more watercolours and have them mounted...no waste :-)
 |
| Looking over to Hartlepool headland. 10x11 inches. |
 |
| Scottish loch. About 6x10 inches |
Tuesday, 28 October 2014
Painting the past.
Every village, town or city has its past, has well known and loved old photographs taken way back at the turn of the 19th century, even earlier in some cases and my hometown of Hartlepool, a medium sized seaside town on the NE coast of the UK has its fair share.
These old photographs are of course black and white and because of their age and how photographic plates were developed in the day are usually not that good a condition, there are flaws when they were developed and because of the technology of the time light area are usually overexposed while the darks are completely underexposed so a while ago I had the thought getting hold of some of these old photos and trying to paint them, bring them to life with a bit of colour and try and put the details back in the light and dark areas.
Of course because the dark areas are completely black I had to use a bit of imagination to fill the area in and of course I had to convert the scene into colour so I also had to make some careful judgments to what colours I actually would use!
When it came to the colours I wanted to keep the palette limited and to tone down the colours because I did not want a bright cheerful picture, Hartlepool at the turn of the last century was an industrious town, smog, dirt so I imagined the buildings to have a dirty look to them and I wanted this to show in the paintings. Also because the distance in these old photos generally degrades so much that nothing much is visible the paintings would have to have a certain looseness with merely hints of details. Here are a few that I've painted.
Materials used : Arches 140lb rough paper, a mixture of Daler Rowney, Winsor and Newton and Daniel Smith artist quality paint.

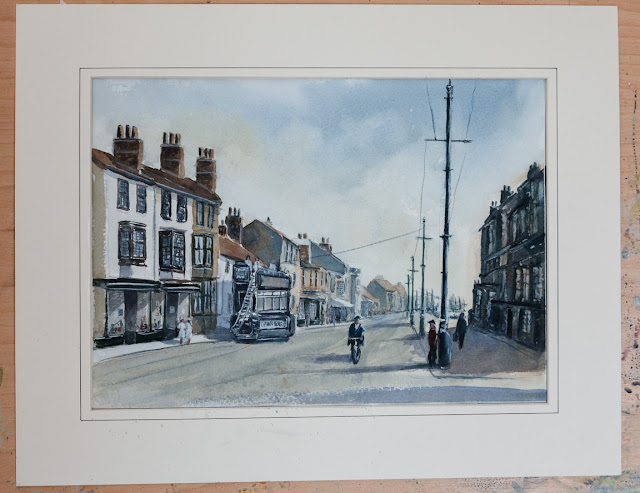
This is a view of Church Street with a couple of them dang new fangled horseless carriages! All of these buildings are still there.
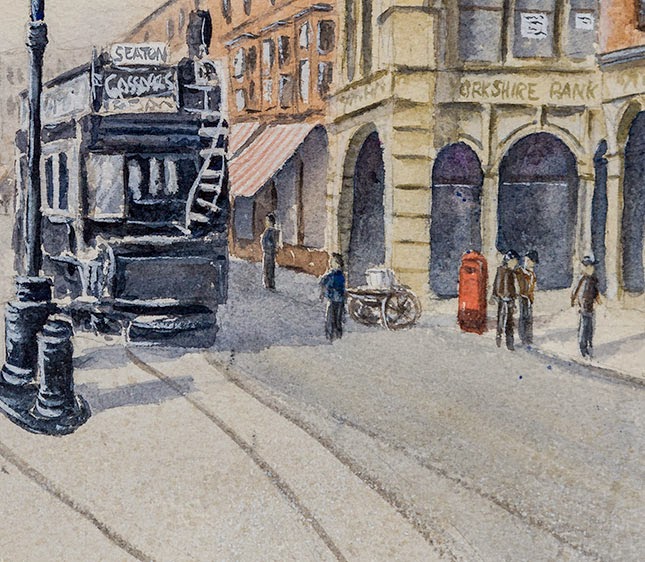
Detail view.
.jpg)
A view looking up Victoria road about 1899, Church street is just behind us. The large building to the left was William Grey dress makers, then Binns stores and now Wilkinsons. The Grand Hotel and the Wesley chapel are still standing today.

Detail view.

Lynn Street, Hartlepools main shopping thoroughfare until demolished in the early 70,s and replaced with our present shopping centre a short distance away.

I photographed the above picture and converted it to B&W to see how it would fare!
.jpg)
The Croft on Hartlepool headland and the oldest part of the town which stretches back to AD 640.
The croft was demolished in the 1930,s and all the white houses on the right of the picture are long gone but everything else still survives to this day.
Sunday, 26 October 2014
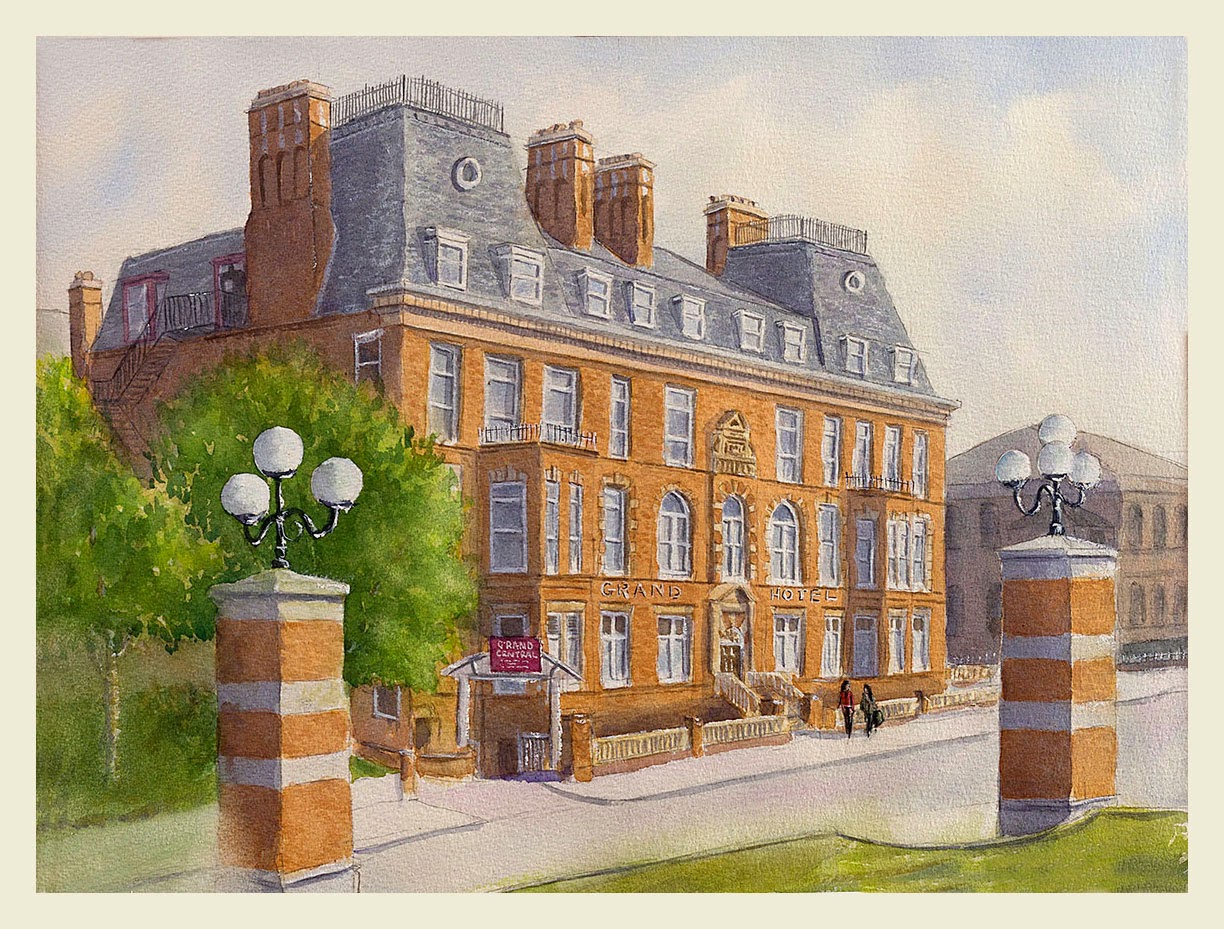
Grand Hotel step by step.
Step by step Grand Hotel painting.
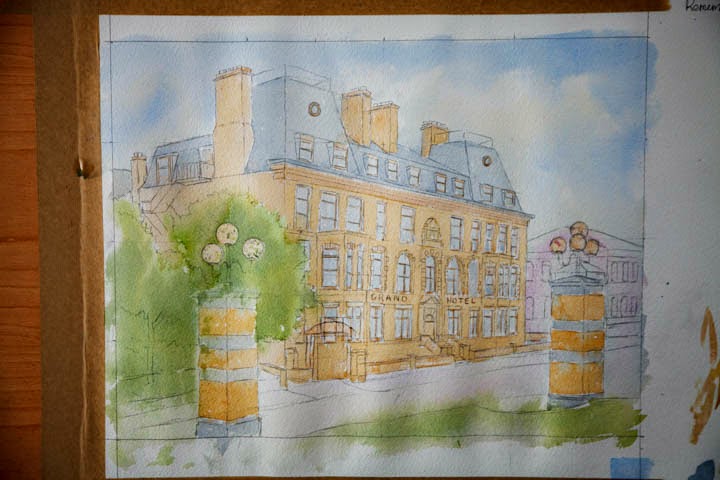
This was a project I recently did, painting Hartlepool landmarks starting with The Grand Hotel owned by Great Western, it is over 100 years old and supposed to be quite haunted!The first step was to actually photograph the place and as it is located on a very busy road opposite a shopping centre you always had people waiting at the bus stop by the building and of course lots of traffic so I went down early one sunday morning to take a few snaps with a clear road, a three shot panoramic and stitched together in photoshop then cropped to the correct size for the painting which was 16x12 inches.
1. Once I had the reference photo I had to actually sketch the building, I usually paint this type of static building very detailed meaning every window and other details had to be drawn in carefully to ensure a firm frame for the painting.

2. Once the drawing was complete I used masking fluid to mask off various features such as the white window frames, railings etc.

3.Starting the painting I applied thin washes over the entire paper and dropping various colours in wet in wet for the sky and trees. Other parts of the picture only had one wash, this allows the artist to quickly assess some colour and tonal values.
4. Next I applied more substantial washes over the painting strengthening the colours and working wet in wet on the trees.

5. Strengthening the colour and tones again I started to add details such as brickwork and roof tiles plus I added washed for the actual shadow areas on the left hand side of the building. This stage of the procedure can last quite a while depending on the amount of detail you want in the picture. I also faded the bottom left corner of the painting as a type of soft vignette.

6. The finished painting. It is quite difficult to try and get an accurate representation when you photograph a watercolour, it NEVER looks as good as when you see it in the flesh so to speak!
Mounted and framed the size is 20x16 inches.
Total time to complete, 12 hours.
.jpg)
Hi and welcome to my first post. I aim to share my experiences with watercolour with you, I am planning to show demos hopefully using youtube and step by step demos and tutorials, also I will use this blog to give help and advice to anyone who may require it.
Thank you for stopping by and I hope to see you again :-)
Thank you for stopping by and I hope to see you again :-)
Subscribe to:
Comments (Atom)